Party Puffin Rainbow Slider Card

Today’s share was inspired by a live video with Artisan Chloe Evans of Australia yesterday. She is awesome and we had so much fun learning to make the rainbow slider card technique. This is my first attempt at it, but I assure you it won’t be my last. I’ve had the Party Puffins stamp set on my craft table for a couple of days and I’ve been itching to ink it up. So what do you think? Ready to give it a go? The challenge this week over at TGIF is a peek a boo window so I entered this one for TGISC321.

I began with a full sheet of Thick Basic White card stock. I cut one 4 1/4″ x 11 and two 4 1/4″ x 5 1/2″ pieces from the full sheet. After scoring the 4 1/4″ x 11″ at 5 1/2″ I folded and then die cut the second largest circle from the Layering Circles Dies at the top center. I lined up the two pieces of 4 1/4″ x 5 1/2″ card stock one at a time to the card front and die cut a hole in each to match the card front.

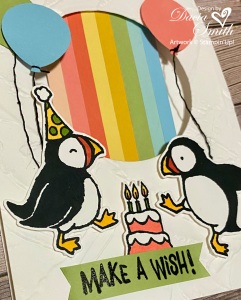
I embossed the first 4 1/4″ x 5 1/2″ card using the Painted Texture 3D Folder and attached it to the card front using Tombow Multi Purpose Adhesive. I then pulled out Party Puffins and stamped the puffins, birthday cake and greeting using my Stamparatus. It’s so easy to get a solid black image because you can stamp them several times with a perfect line up each time. My Paper Snips came in handy for fussy cutting out the pieces after I colored them with my Blends. The balloons were punched with the recently retired balloon punch and I tied the strings to each using the Basic Black Baker’s Twine from the Essentials Pack.

The slider was made by beginning with a 2″ x 8 1/2″ piece of Basic White card stock scored at 1/2″ along the 2″ side and applying eight 1/4″ x 8 1/2″ strips of card stock butted against the fold. My rainbow includes Petal Pink, Flirty Flamingo, Calypso Coral, So Saffron, Bumblebee, Pear Pizzazz, Pool Party and Balmy Blue. I wanted a pastel pallet but you could use any of our over 50 colors of card stock to create your rainbow. The finished strip is attached to the backside of the card front by applying adhesive on the 1/2″ x 2″ folded edge and attaching it flush against the 5 1/2″ fold in the middle (see inside photo). I centered the strip in the window opening.

Lower the rainbow strip over the inside and attach a 1/4″ x 1 1/2″ strip of Basic White card stock to the inside at the right and left side of the rainbow strip. There should be a 1/8″ space between the Basic White strip and the rainbow strip on each side. These strips of Basic White card stock are to keep the slider mechanism moving smoothly up and down. Next you thread the rainbow slider through the hole of the second 4 1/4″ x 5 1/2″ piece of Basic White card stock and attach it to the inside card base only at the sides and top of the Basic White strips. The center needs to be free of adhesive so your rainbow can freely slide up and down when the card is opened. With the card closed, trim off the excess rainbow strips flush at the card bottom.

With the card fully open the last step is to stamp the hidden greeting on the rainbow strip. I used my Stamparatus to position the greeting just above the bottom edge of the circle and centered right to left across the rainbow. With the magnets securely in place I could always stamp it a second time if I didn’t get good coverage the first. There’s plenty of room under the circle for decorating or an additional hand written message.

I hope you enjoyed this fun fold rainbow slider card and will give it a try. If you have any questions just reach out, I’m happy to help!

If you are in need of supplies and live in the United States…

I’d love to be your Stampin’ Up demonstrator!

You can order your supplies from my online store here. Looking forward to connecting with you soon.

Happy stamping,

Dacia Smith
Encouraging Flowers of Friendship

My share today is one of the encouragement cards we mailed to our shut-ins this month. Over 100 cards are created every month and sent to those in need. We also partner with Meals on Wheels in our community and have them delivered with meals for the week.

The card began with a 4 1/4″ x 11″ base of Polished Pink card stock scored at 2 3/4″ and 5 1/2″. The next layer is 3 3/4″ x 5″ of Basic White embossed at the top half using the Pretty Flowers 3D Embossing Folder. The bottom half is decorated with a 2″ x 3 3/4″ piece of the hostess Pattern Party DSP selection. A 1/2″ x 3 3/4″ piece of Basic Black card stock was placed over the seam and wrapped in Black Glittered Organdy Ribbon and attached to the card front centered using Mono Liquid Glue only at the bottom portion of the layer.

The next layer is cut from Basic Black card stock with the largest Stitched So Sweetly scalloped border die. From the center of the cut out piece we die cut the focal point image using another Stitched So Sweetly die, saving card stock that would be covered by the Basic White matting layer anyway. The Basic White layer is 2 5/8″ x 3 3/4″ and embossed with the Tasteful Textile 3D Embossing Folder. This layer is attached to the card base centered using Dimensionals.

Our focal layer is stamped with a sentiment from Hydrangea Haven in Versamark and heat embossed with White Embossing Powder. The blossoms are from Flowers of Friendship stamped in Memento Black. Each is colored using Polished Pink and Old Olive stamping blends and applied with Mini Glue Dots. The focal layer is attached to the card base with Dimensionals. The final touch is a bow tied with the Black Glittered Organdy Ribbon and attached with a Mini Glue Dot.

The inside begins with a 3 7/8″ x 5 1/8″ layer of Basic White card stock. Attached at the bottom with Mono Liquid Adhesive is a layer 1 3/4″ x 3 7/8″ of Basic Black card stock embossed with the Pretty Flowers 3D Embossing Folder. The next layer is 1 1/4″ x 3 1/4″ of Basic Black cut from one of the Stitched Rectangle dies. It is stamped with a sentiment from Hydrangea Haven and embossed with White Embossing Powder. Attached in the upper right corner is a small bloom stamped and colored with Polished Pink Blends from Hydrangea Haven. The finished layer is attached to the inside centered at the bottom using Dimensionals.

Our card this month is an easel card that our shut ins can display on a table next to their favorite chair to enjoy for the month. It’s such a blessing to be able to bring joy to others! We include scripture and an encouraging message in each card sent.

If you are in need of supplies and live in the United States…

I’d love to be your Stampin’ Up demonstrator!

You can order your supplies from my online store here. Looking forward to connecting with you soon.

Happy stamping,

Dacia Smith

Embossed Shells Ashore

Today’s share was inspired by Cindy Schuster over at the Crafty Carrot Co. The featured stamp set this month is Friends are Like Seashells and we are off to a great start. Hope you’ll consider participating one month, It’s loads of fun and a great way to meet fellow crafters.

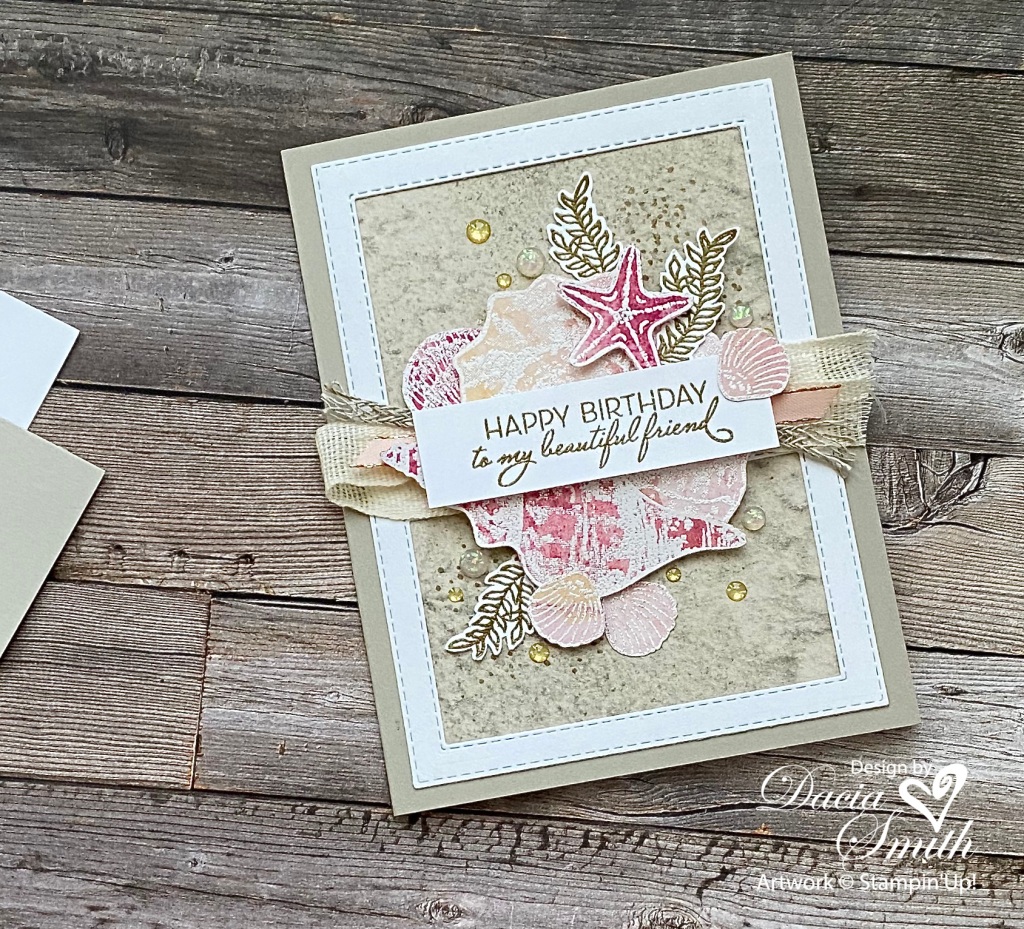
I started with a Sahara Sand card base 5 1/2″ x 8 1/2″ scored at 4 1/4″. Die cut the largest Stitched Rectangle die from Thick Basic White card stock and then cut two smaller (2″ x 3 1/4″) rectangles at the top and bottom forming a bridge in the middle to build the focal point. Layer a 3 1/2″ x 4 3/4″ piece of Sand and Sea Designer Paper behind and mount to card base centered.

For texture, l frayed the ends, layered on Forever Greenery, Petal Pink and Braided Linen Trim and stamped the speckled image in the top right and bottom left corner of the Sand and Sea DSP.

For the focal images, I stamped the various seashells from Friends are Like Seashells directly on the Sand and Sea DSP and heat Embossed with White Embossing Powder. I fussy cut them out at the embossed edge and layered them to the card center using Dimensionals. The greenery and greeting are stamped on Basic White and embossed using Gold Embossing Powder.

The design wouldn’t be complete without a few jewels. I used the Opal Rounds and Gold Glitter Enamel Dots sprinkled generously.

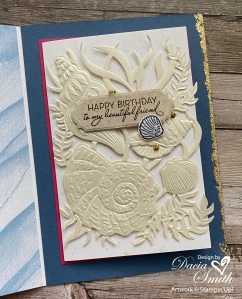
I took cues from the front of the card to the inside and created a matching image in the lower right corner using some of the leftover images from the front and a few more jewels.

If you are in need of supplies and live in the United States…

I’d love to be your Stampin’ Up demonstrator!

You can order your supplies from my online store here. Looking forward to connecting with you soon.

Happy Stamping,

Dacia Smith

Seashell Friends Birthday

One of the card ministry volunteers is celebrating her 80th birthday. That calls for a celebration and a special card!

This one was inspired by Susan Wong over at the Crafty Carrot and Rachel Tessman with Stamp Your Art Out. The featured stamp set this month at the Crafty Carrot is Friends are Like Seashells. Yesterday Rachel participated in the Sand & Sea All Star Blog Hop. She posted a great video with instructions for recreating a simpler version of her million dollar card from Shelli and Sara using the Sand & Sea Suite. Susan’s live introduced a spinner card using the Layering Circles Dies in Misty Moonlight and Polished Pink from the same suite.

After watching two great videos I got started on this one last night and finished it this morning. There are so many great details that make this card an over the top WOW! The colors are compliments of Susan/Expressions in Ink DSP and the design/measurements are from Rachel/Shelli/Sara.

The Friends are Like Seashells stamp set and dies carried over to the new catalog but the Sand and Sea Designer Paper retires June 30 or until supplies are depleted. If it’s a favorite or on your wish list don’t wait, you might be disappointed.

The colors for the designer paper are Blushing Bride, Flirty Flamingo, Melon Mambo, Sahara Sand, Seaside Spray and So Saffron. The patterns are lovely and could be used year round and with a variety of other stamp sets.

I’ve been learning to use the Gilded Leafing and wanted to include it in the details of my special card. It was added to the shell on the cover, the edge of the medallion on the front denoting her milestone birthday, the card’s back edge and the starfish on the message panel. It’s so elegant and takes any ordinary card to the next level for sure! The card is wrapped in Fine Art Ribbon for a little more added sparkle and is retiring at the end of June. The “80” is from Memorable Moments, a Stampin’ Up set that retired several years ago. It’s a favorite for special occasions so I’ve kept it in my inventory.

I’ve added the Expressions in Ink Specialty Designer Paper to the Sand & Sea DSP. It was on my work surface and fit right in with the color combo and the gold leafing. It was the only sheet in the Impressions pack I hadn’t cut into.

All of the images and greetings are from the Friends are Like Seashells stamp set. I’ve also used the Seaside Seashells dies and the Seashells 3D Embossing Folder. When the Pearlescent Specialty Paper is used in place of Basic White it brings the shells to life. Doesn’t the embossed die cut image just pop on the Basic White background? For an added WOW I stamped the greetings and applied Clear Embossing Powder to each for an added sheen. This is really easy to achieve when stamping with the Stamparatus.

The adjacent panel to the message area was decorated with stamped embossed shells. Before stamping, I first die cut the image, and then stamped the shells in the corresponding areas. The stamps are photopolymer so lining up the images is easy peasy. Last step, run the die cut stamped image through the 3D embossing folder. I can’t get over how real they look, just breathtaking.

My embellishments throughout are the Gilded Gems. They were a perfect choice to complete the gold theme throughout the card.

I hope my special volunteer is as excited about the card as I’ve been creating it. Sometimes it’s hard to part with our over the top creations, but I’m sure this one will become one treasured card that will be enjoyed for years to come. I hope my share today inspires you to create an over the top card for a special someone in your life! We have the capacity to make a difference in the life of another, just get started, and you’d be surprised what you are capable of doing.

If you are in need of supplies and live in the United States

I’d love to be your Stampin’ Up demonstrator!

You can order your supplies from my online store here. Looking forward to connecting with you soon.

Happy stamping,

Dacia Smith

Expressions of HSSSC365

Today’s share is inspired by the Hand Stamped Sentiments Sketch Challenge 365. When you’re having trouble with your creativity it’s helpful to find a sketch to jump start your creating. Hand Stamped Sentiments could be a great place to start! Hope you’ll link on over and give this sketch a try.

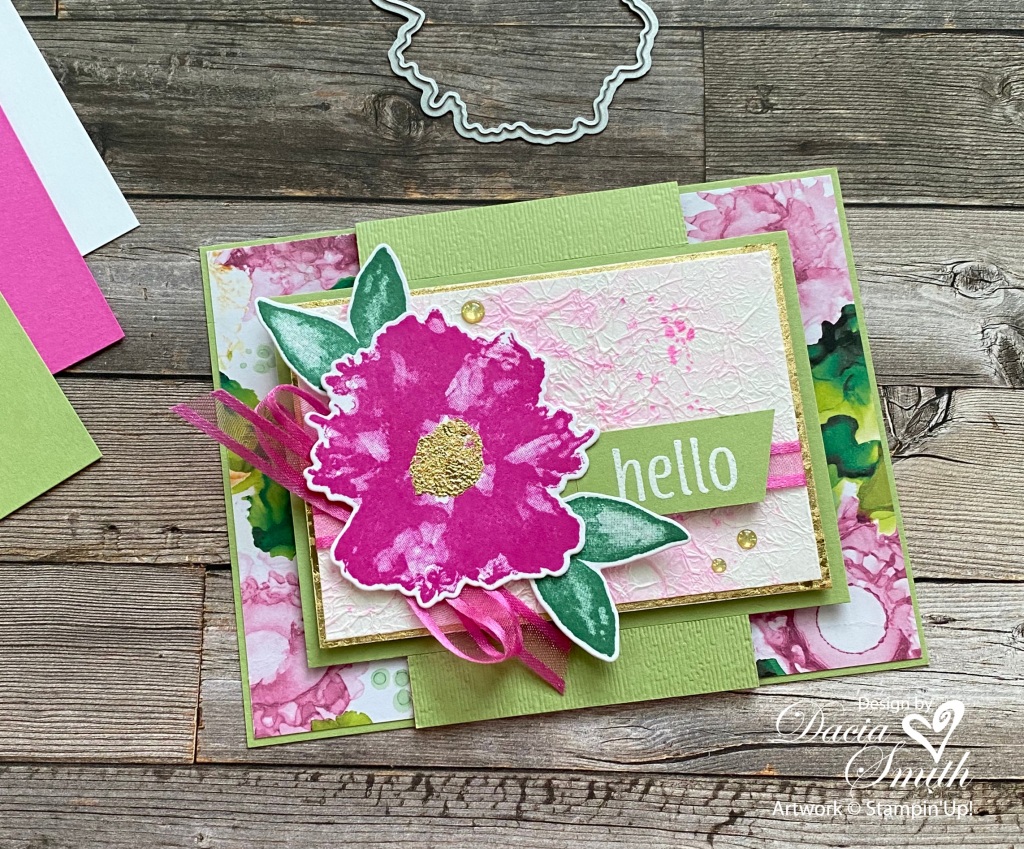
To recreate this one begin with a 4 1/4″ x 5 1/2″ Pear Pizzazz base. Add two strips 1 1/4″ x 4 1/8″ of the Expressions in Ink Specialty Designer Paper to each side using Tombow Multi-Purpose Adhesive. Add a 2 3/4″ x 8 1/2″ strip of Magenta Madness card stock scored at 4 1/4″ to the center of the card front. Add a 3 1/8″ x 4 3/8″ piece of Pear Pizzazz to the center of the card front only applying adhesive to the Magenta Madness strip. Add two pieces of 9/16″ x 2 3/4″ Pear Pizzazz card stock to the Magenta Madness strip at the top and bottom. I embossed each for texture before applying.

For the focal point I began with a 2 7/8″ x 4 1/8″ Basic White card base that I added Tear and Tape to the outside edges. I applied Gilded Leafing to the tear and tape to make a beautiful gold border. The next layer is 2 3/4″ x 4″ of Basic White that I’ve applied the faux linen technique. I applied a water color wash and splattering of Polished Pink to the tissue paper before I crinkled it up and applied it to the Basic White layer covered with an Adhesive Sheet. I wrapped an Open Weave Polished Pink Ribbon around this layer and attached a faux bow to the left side. The blossom was stamped using Magenta Madness and Just Jade with

Gilded Leafing in the center and applied to the faux linen layer using Dimensionals. The greeting from Artistically Inked was stamped using Versamark and embossed with White Embossing Powder. Apply this finished layer to the card base using Dimensionals.

The inside packs a WOW with the smaller Magenta Madness and Just Jade blossom applied to a 4″ x 2 1/2″ Basic White Panel to write your special message. It’s beautiful inside and out just like you! Thanks for popping by to check out my share for today. Don’t forget to link up your play of the sketch at Hand Stamped Sentiments. A new sketch goes up every other Tuesday.

I would love to be your Stampin’ Up Demonstrator!

If you are in the United States and need a demonstrator, then you can order your supplies from my online store here. Looking forward to connecting with you soon.

Happy Stamping,

Dacia Smith